How to connect a device to Clea
Overview
Clea OS simplifies the process of connecting to the broader Clea software suite, enabling seamless integration with other Clea modules. For a comprehensive understanding the role of Clea OS within the Clea software stack, please refer to the Clea OS as part of the Clea suite and to the Clea OS Architecture page. These pages highlight how Clea OS is preconfigured with all necessary components to connect to Clea’s cloud services, including Clea Astarte for data orchestration and Clea Edgehog for device management. Ensure you have reviewed these resources before proceeding.
In this page, you will find detailed instructions to effectively set up a device running Clea OS to connect it to Clea Cloud. This process includes properly configuring both Clea Astarte and Clea Edgehog, using your personal credentials to modify the necessary configuration files in the OS. Following these steps ensures that your device is correctly integrated into the Clea ecosystem, enabling full utilization of the cloud services provided by Clea.
Even though the Clea OS Embedded distro comes with Clea IoT agents preinstalled, to take full advantage of all Clea's features, such as the remote OTA updates, you need to use Clea OS Things distro.
A necessary requirement is having a device with Clea OS and access to online instances of Clea Astarte and Clea Edgehog to connect to. Check the pages in the Get Started section to learn how to compile a Clea OS Things image from scratch, or download a precompiled Clea OS Things image directly from the Release page. Use the information in the Installation page to prepare and flash it on a device.
Connect your Device to Clea online services
This page will guide you through the manual configuration that should be performed to connect a new device to Clea. First, this section will show you how to manually register a device to Clea Astarte, and how to configure the previously flashed device, using the credentials obtained during the registration process.
This kind of manual procedure to connect a new device is useful as a starting point for a demo or a trial connection. The data orchestation platform Clea Astarte also supports a fully automated registration process that is raccomanded to be used in production and is explained in the Clea Astarte documentation but not covered here in this page.
The main components already installed in Clea OS that allow communication with the Clea online platforms are:
- Astarte Message Hub:
astarte-message-hub- A central service written in Rust for collecting and delivering messages to Astarte. Thanks to this component, which acts as an aggregator, it is possible to have multiple applications on the device communicating with Astarte, sending different data that are recognized as coming from a single device ID. - Edgehog Device Runtime:
edgehog-device-runtime- A portable middleware written in Rust that enables remote device management using Edgehog. This agent communicates to and from Astarte/Edgehog by passing data through theastarte-message-hub.
What you need in advance:
- A previously flashed board with Clea OS
- Astarte Dashboard URL
- Edgehog Dashboard URL
- Astarte API URL
- Astarte Realm
- Astarte Auth Token
- Edgehog Tenant Slug
- Edgehog Auth Token
Registering a Device
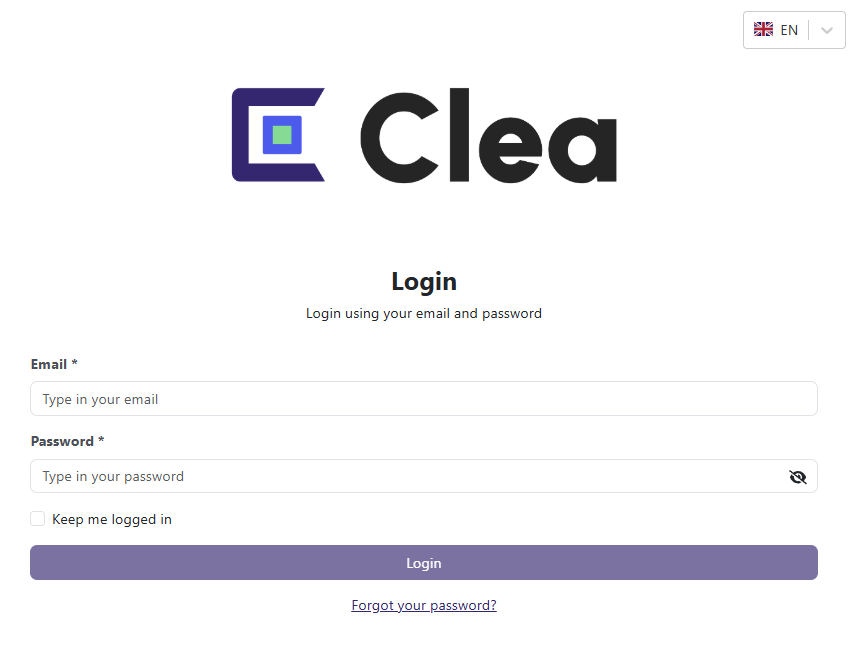
- Connect to Clea admin portal using the URL and admin credentials provided to you after the registration, and enter in your tenant (or create a new one).
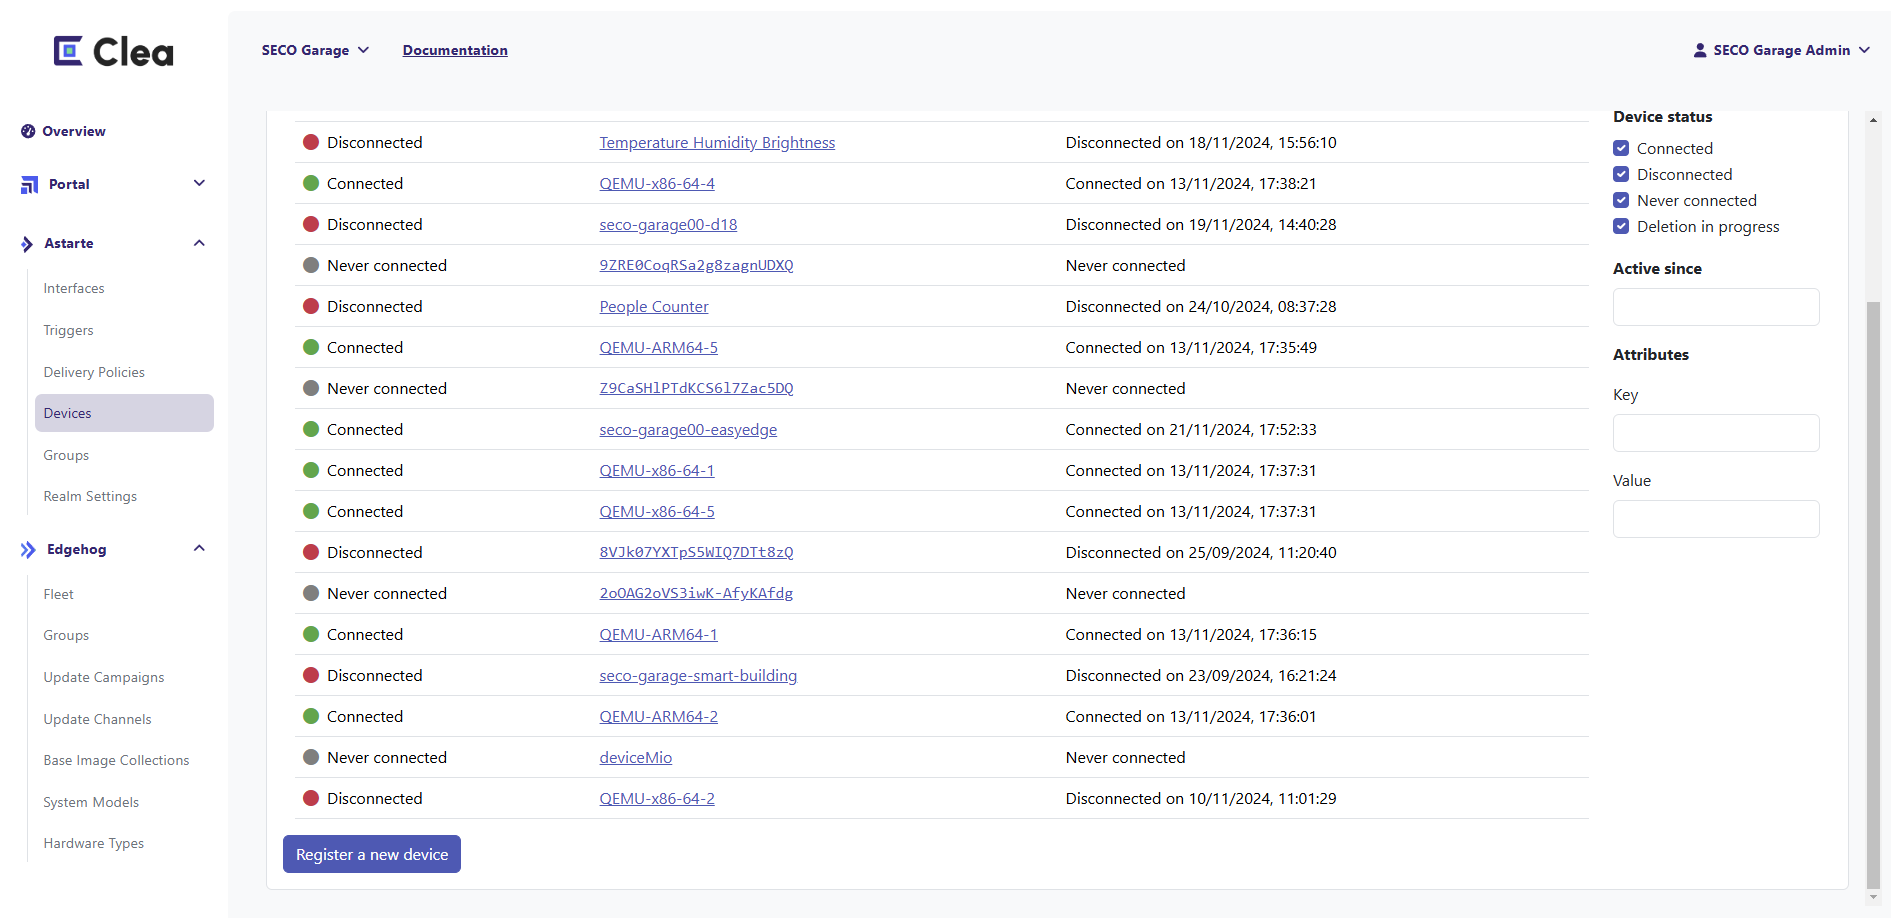
- In the left menu, go to the “Devices” section under the "Clea Astarte" group, and click the Register new device button on the bottom part of the page.
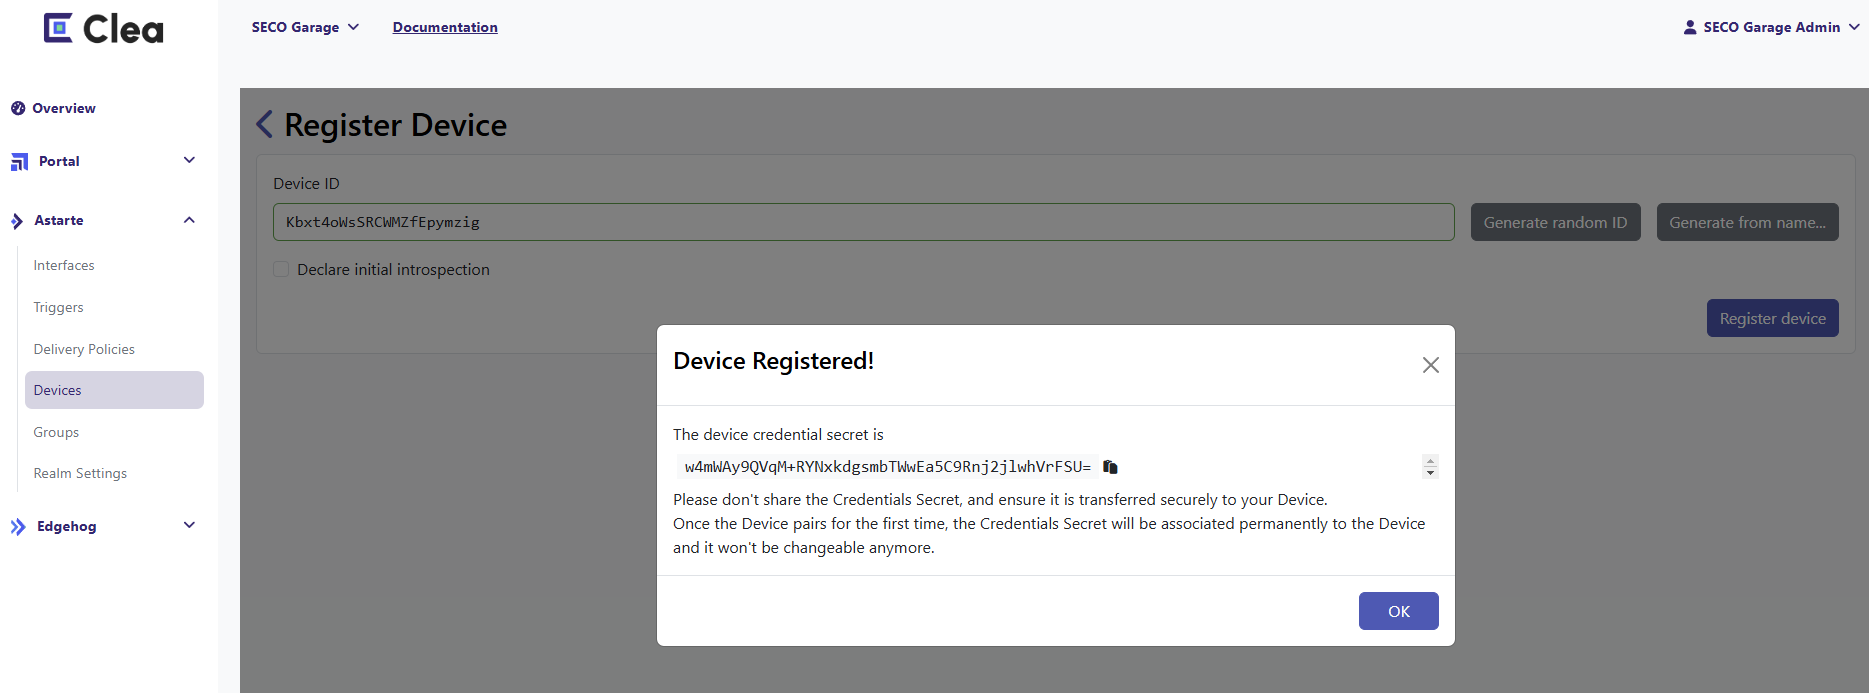
- Generate a random Device ID for the device you want to register (or generate it from a common name) and click on Register device.

- The action will create a Credentials secret which shall be seen as a token that uniquely identifies the Device to Astarte and Edgehog portals, copy and save it for later use when setting up the Astarte Message Hub on the device.
Configuring the board
Astarte Message Hub
This guide will show how to configure the Astarte Message Hub service that allows to connect multiple applications and system services using just one MQTT connection to Astarte such as the Edgehog Device Runtime application to manage the life-cycle and collect system information of the device.
- Edit the Astarte Message Hub config file using the
vieditor. Run the following command in the device to open the configuration file
# vi /etc/message-hub/config.toml
On Clea OS Embedded distro, this configuration file is not present by default at the first boot. You can modify the template stored in the same directory # vi /etc/message-hub/config.toml_template, then rename it with the command # mv /etc/message-hub/config.toml_template /etc/message-hub/config.toml once you have finished making your changes.
- Use the insert mode (
i) to change the variable values according to the lines below:
##
# Required fields
#
realm = “Astarte_Realm”
pairing_url = “Astarte_API_URL/pairing”
grpc_socket_port = 50051 # Required, 0 is only a placeholder
##
# Optional fields
#
interfaces_directory = “/usr/share/edgehog/astarte-interfaces/”
# Device ID, if not provided it will be retrieved from `io.edgehog.Device` dbus-service
device_id = “YOUR_UNIQUE_DEVICE_ID”
# Credential secret, if not provided the `pairing_token` is required
credentials_secret = “YOUR_CREDENTIAL_SECRET”
# Ignore SSL errors, defaults to false
astarte_ignore_ssl = false
# Path to store persistent data, defaults to “./”
store_directory = "/var/lib/message-hub/"
where YOUR_UNIQUE_DEVICE_ID and YOUR_CREDENTIAL_SECRET are respectively the Device ID and Credentials secrets created in the previous steps.
Edgehog Device Runtime
In order for the device to be correctly recognised in the Clea Edgehog, it is important that the serial number and part number information are set on the board as variables.
In particular, the EDGEHOG_SYSTEM_PART_NUMBER variable allows the board to be identified with a particular System Model and Hardware Type in the Clea Edgehog portal.
For a better understanding of these two concepts, you can also have a look at this Clea Edgehog documentation page.
These two information can be set for the Edgehog Device Runtime as environment variables.
- Open the Edgehog Device Runtime service configuration file
# vi /lib/systemd/system/edgehog-device-runtime.service
- Use the insert mode (
i) to insert the following lines below the[Service]section:
[Service]
....
Environment="EDGEHOG_SYSTEM_SERIAL_NUMBER=YOUR_SERIAL_NUMBER"
Environment="EDGEHOG_SYSTEM_PART_NUMBER=YOUR_PART_NUMBER"
Restart the Astarte and Edgehog services
Once the file is correctly changed, restart the Astarte and Edgehog platform-related services via the command
# systemctl restart edgehog-device-runtime.service edgehog-hardware-id.service astarte-message-hub.service
or reboot the board to connect the Astarte Message Hub to the Astarte Cloud instance.
Disabling the Astarte and Edgehog services in Clea OS Embedded
If you're using Clea OS Embedded distro, the Astarte and Edgehog services are disabled by default, but they will be enabled as soon as you create the /etc/message-hub/config.toml config file, as seen above.
Only in this distro, you can disable again the services using the tool clea-iot.sh, running the command clea-iot.sh -d. Here the tool help to check the commands you can use to enable/disable the services and delete the config.toml configuration file.
- "-l or --listen" for enabling the services once the right configuration is detected;
- "-d or --disable" for disabling the services.
This as an optioanl additional argument:
- "-f or --force" to delete the configuration files.
Display your Device on Clea Astarte Dashboard
In the Clea admin panel dashboard of your tenant, go to the Clea Astarte group in the left menu and click on "Devices" to see the list of devices registered in the tenant. Each device in the list is displayed with information about its status and the last connection event. The status is represented by a grey dot if the device has never connected to Astarte, a green dot if it is currently connected, a red dot if it is currently disconnected. The last connection event shows the date of the last connection or disconnection, if available.
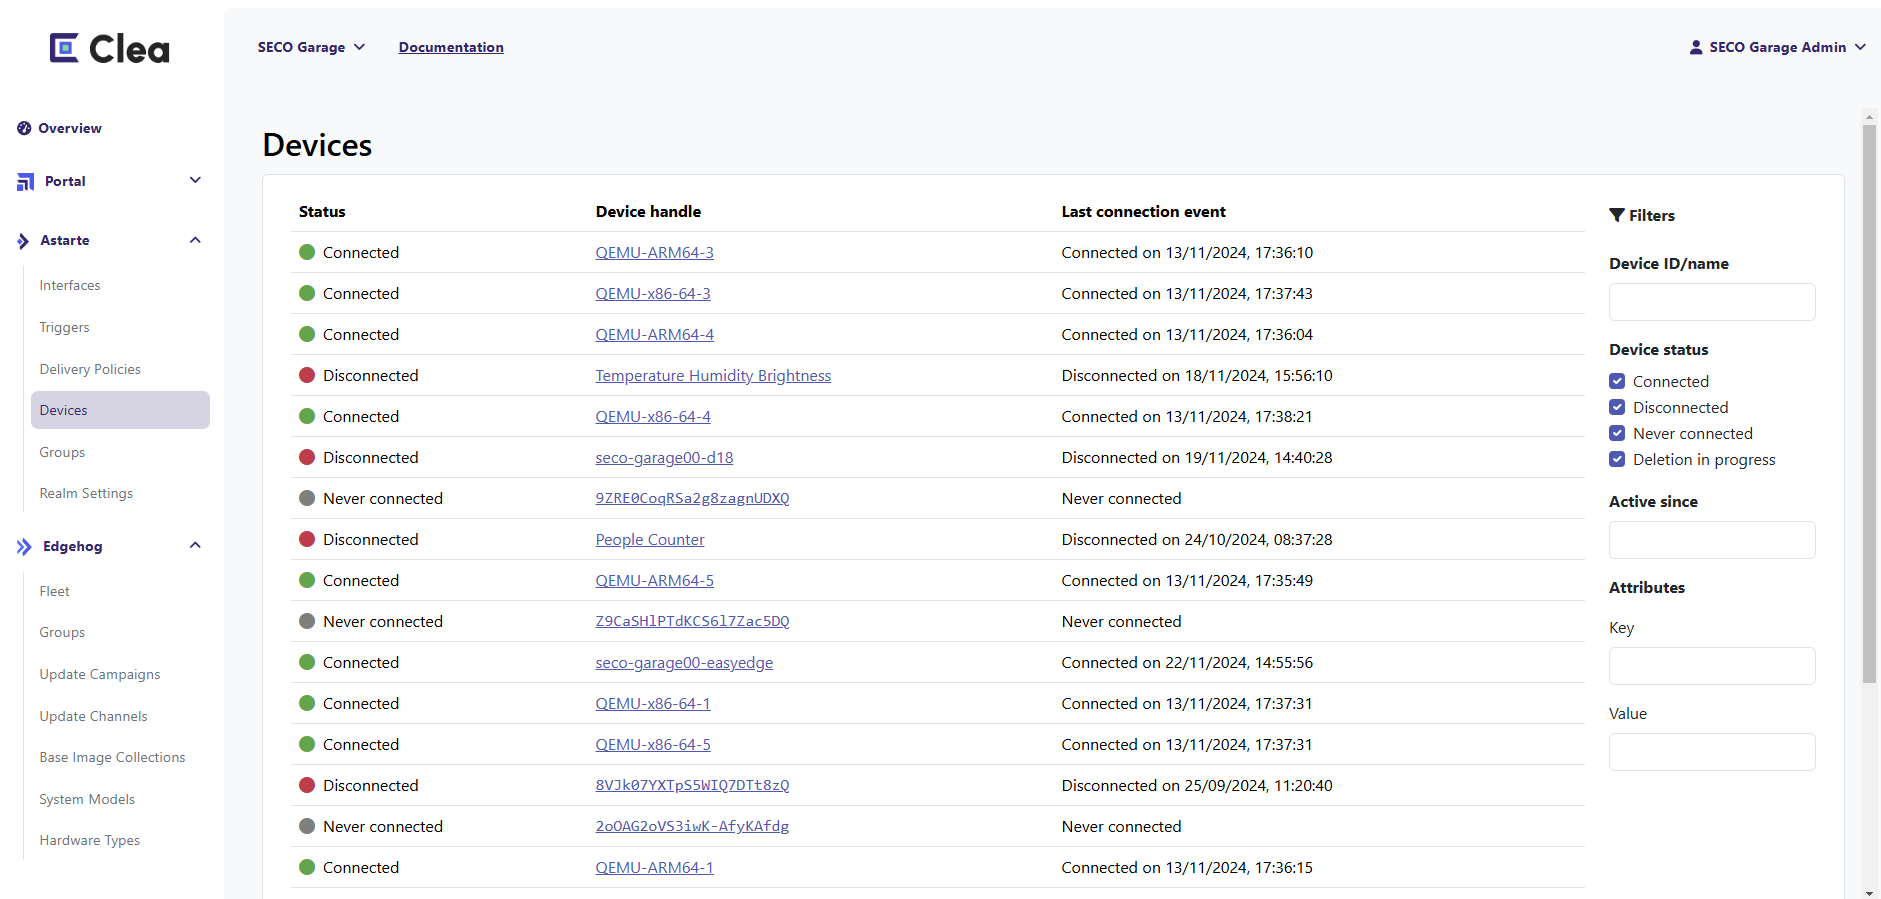
Filter and select your device ID to check the status of your device and how it is configured.
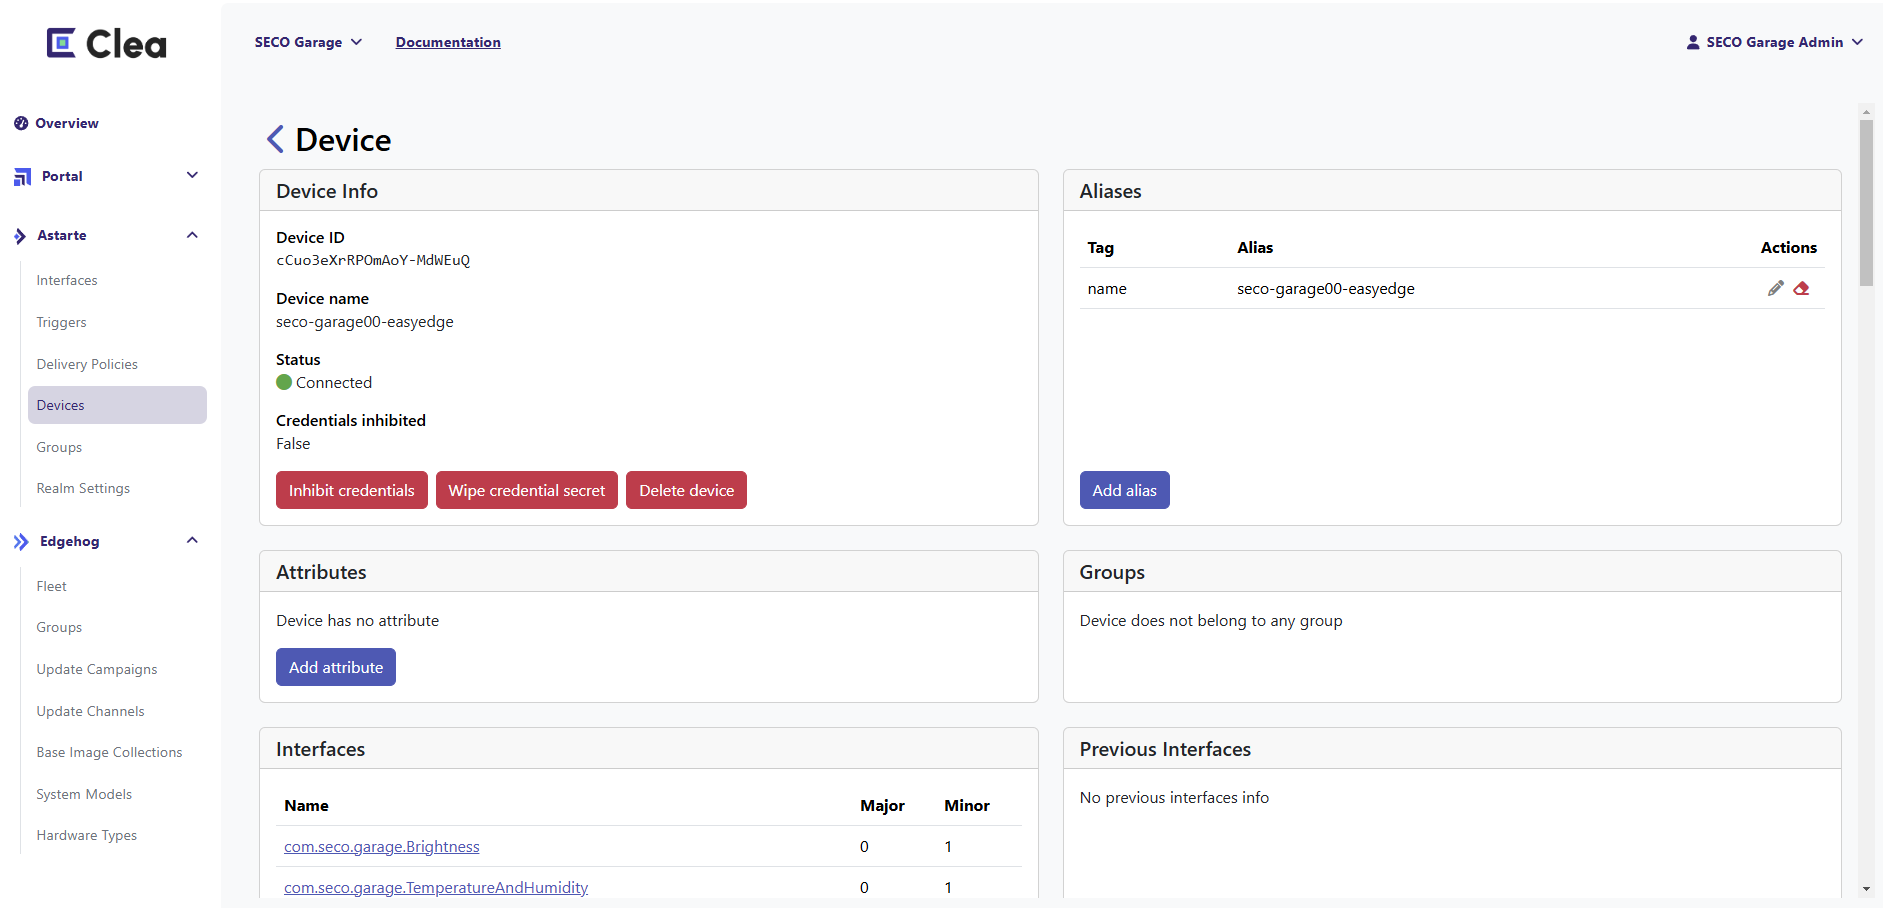
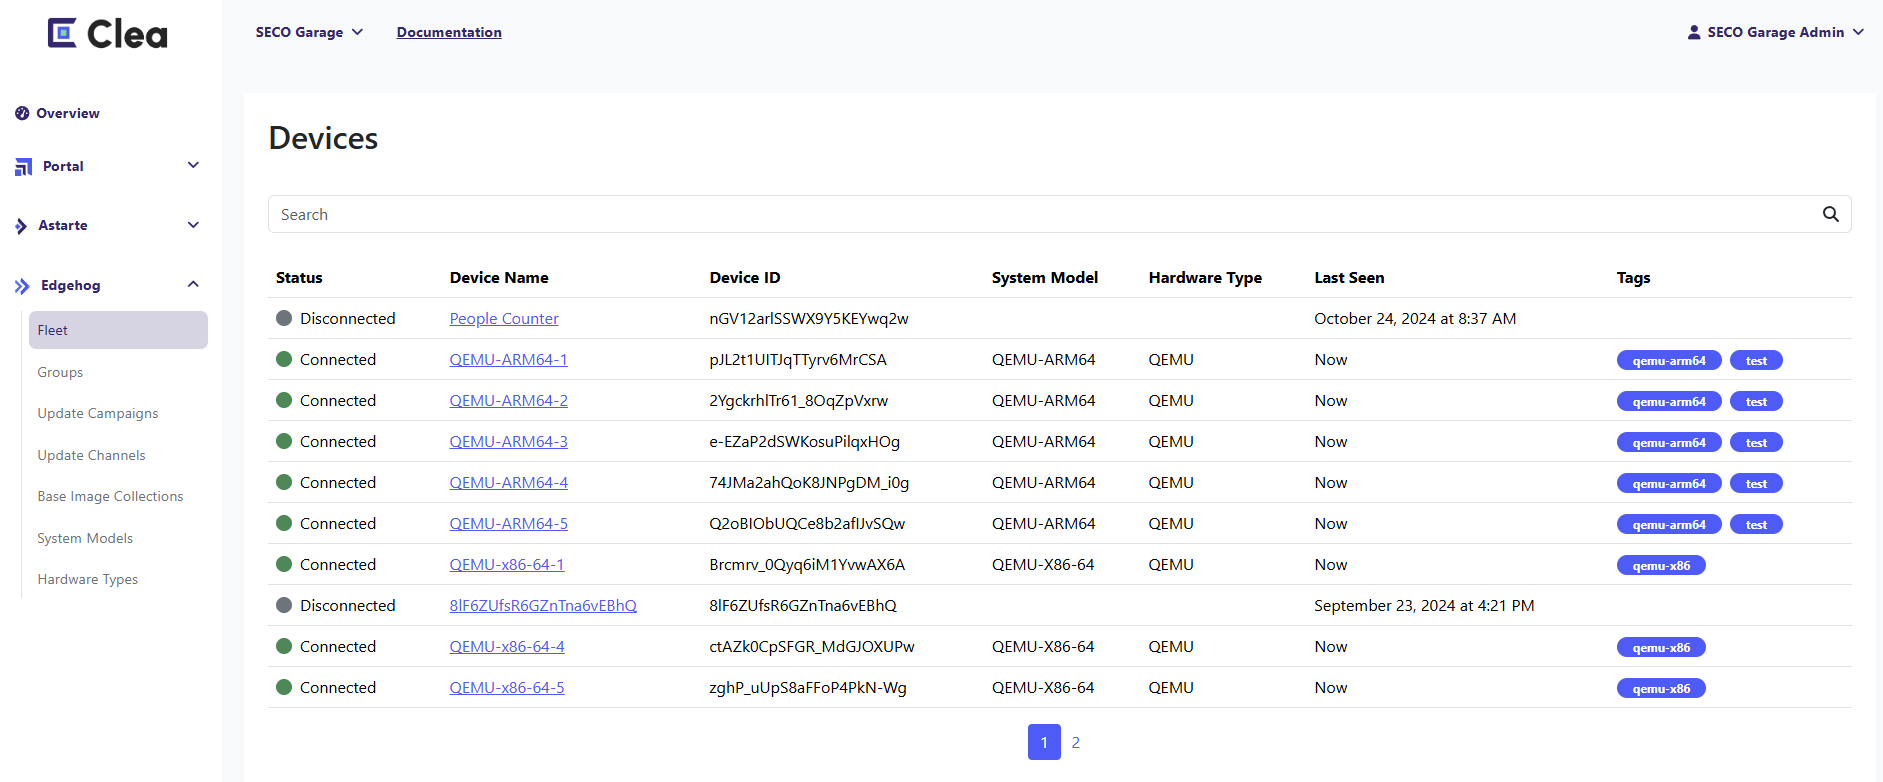
Display your Device on Clea Edgehog Dashboard
In the Clea admin panel dashboard of your tenant, go to the Clea Edgehog group in the left menu and click on "Fleet" to see the list of devices registered in the tenant that enables the Clea Edgehog Device Manager functionalities to send and receive data via the Edgehog Device Runtime.
Go to the Device page and select your device ID to see the data sent by the device to the Clea Edgehog portal.
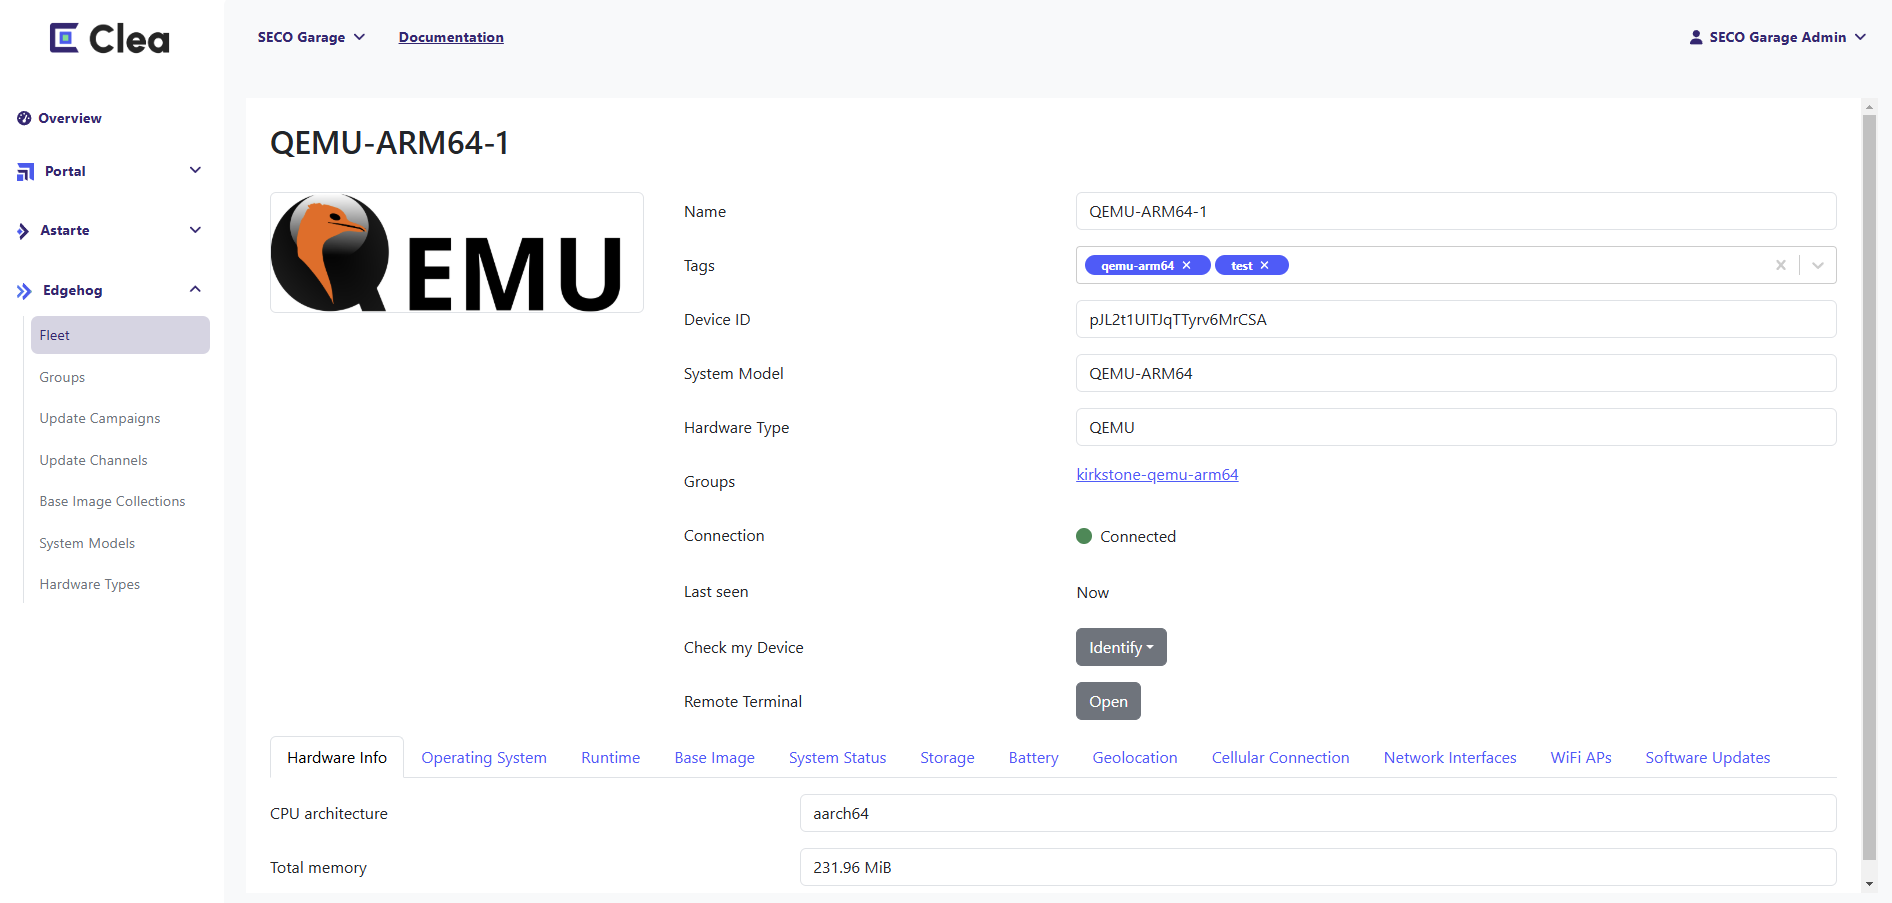
From this page it is also possible to access the functions provided by each device, such as remote terminal access (for Linux devices) and OTA update campaigns for the board's operating system or firmware.
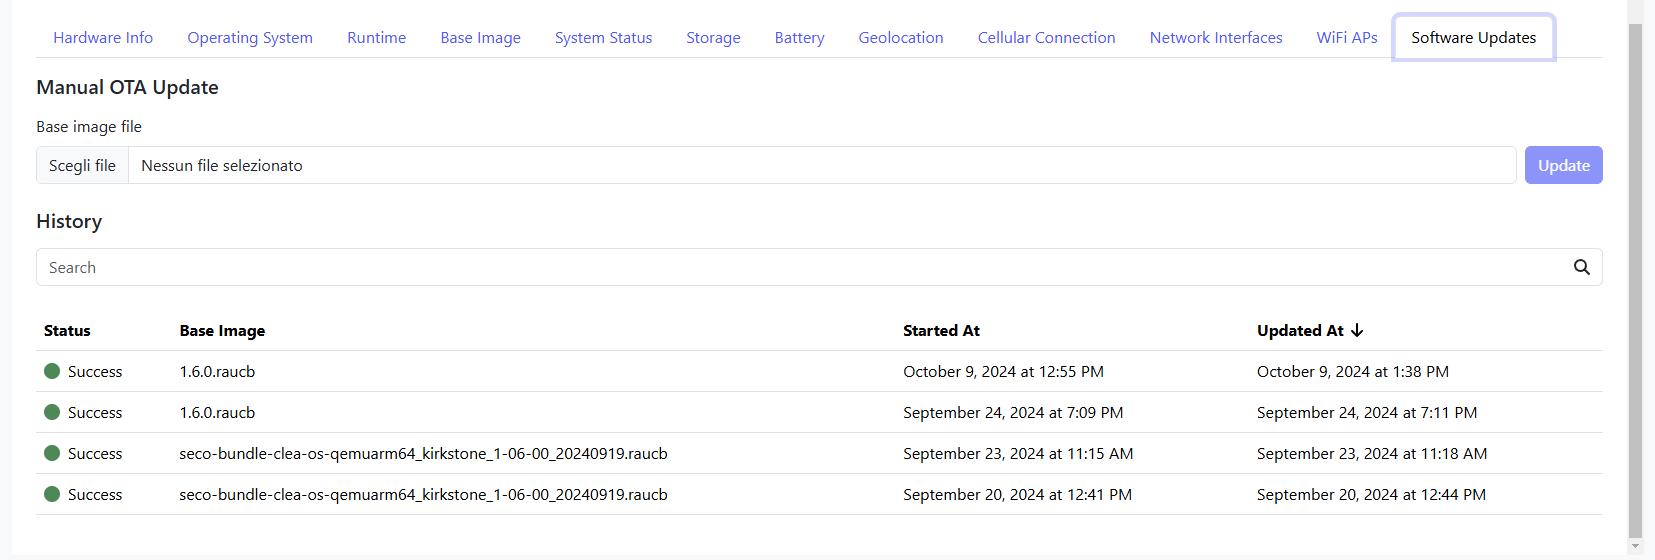
To test an OTA Operating System update on a single device, a RAUC bundle from the Clea OS Things build needs to be uploaded to the Clea Edgehog portal for online delivery to the device.
To find out which command to use to compile a Clea OS Things OTA bundle, refer to the end of the Build section of the Build Clea OS page.
